
The other course at Troon North, aside from the Pinnacle, is the Monument. Troon revolutionized the upscale golf world when they opened the Troon North Monument course 25 years ago featuring the first country club "member for a day" experience. Since then Troon has grown to a worldwide leader in daily fee course management and now is entering into the private course management business.

The Monument course was the first to be built back in 1990. It was designed by Tom Weiskopf and Jay Morrish. Back then, Troon North was out in the middle of nowhere. Now North Scottsdale has creeped in and the courses are surrounded by mega-bucks housing. However, the courses have lost none of their luster. Troon North still is the standard that all other desert courses aspire to.
.jpg)
I have heard stories back in the day when the course first opened, that it was THE course to get onto. Investment bankers, CEOs, and other big-ballers used to call in (well their minions did at least) and beg for tee times, which could not be had. They were booked solid.
.jpg)
With demand so high, the second course was planned for, in conjunction with a residential community. The Pinnacle course opened in 1996. However because the second course was never really planned for when the Monument was first built, the routing of the Pinnacle course was not the friendliest. Walking was essentially impossible, what with a half mile walk between the ninth and 10th tees.
Weiskopf admitted that changing the routing of the courses was something he considered as soon as the Pinnacle course was laid out. With the tremendous success of the courses it was a bit of a risk. Back then the courses were still #1 and #2 public courses in Arizona with the way they were originally laid out. However Troon and Weiskopf new it could be better, and decided to move forward with a re-do.
The re-routing of the courses went something like this:
- Holes 10-18 of the original Pinnacle layout became holes 1-9 of the new Pinnacle layout.
- Holes 10-18 of the original Monument course became holes 10-18 of the new Pinnacle layout.
- Holes 1-9 of the Monument stayed mostly as is.
- Holes 1-9 of the original Pinnacle layout became holes 10-18 of the Monument.
Along with the re-routing, greens were reseeded with creeping bentgrass, bunkers were removed and remodeled and the Pinnacle course was transformed into more of a tumbling links-style look.
The Monument course is largely desert style golf- with forced carries to lush patches of fairway amidst the scrabble of the desert. The course offers a myriad of tee options for all skill levels.
Black plays 7,070 yards with a rating and slope of 72.9/147
Gold plays 6,682 yards with a rating and slope of 71.6/137
Silver plays 6.236 yards with a rating and slope of 69.2/130
Copper plays 5.874 yards with a rating and slope of 68.4/126
Jade plays 5.099 yards with a rating and slope of 64.9/118
Lets get on to the course
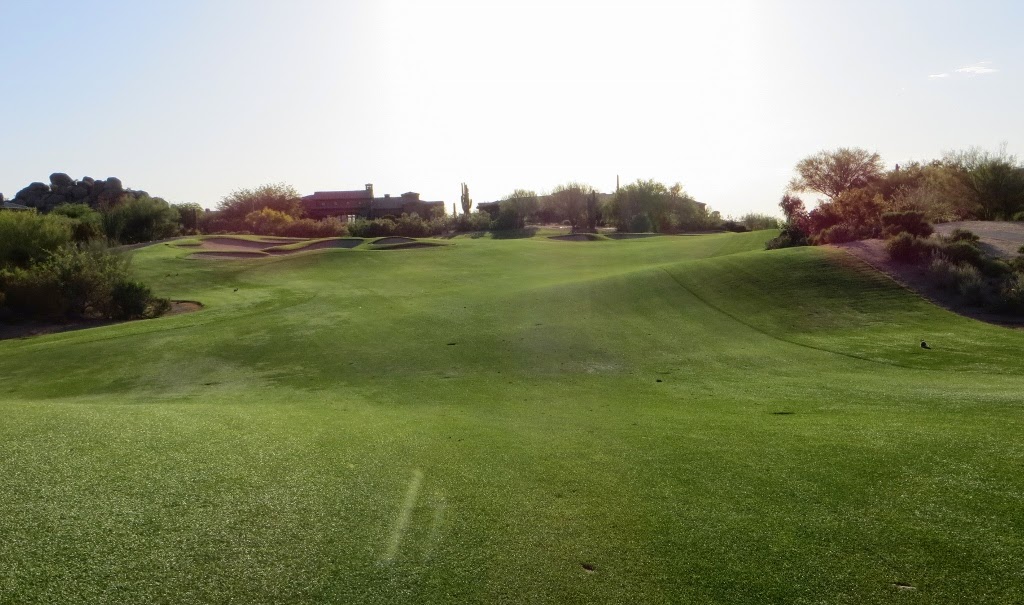
Hole 1 Par 4
444 | 411 | 400 | 370 | 300 yards


A forced carry of the tee is also required here to the first landing area. This first fairway area ends about 150 yards from the green.

Hitting the fairway is critical to have a chance in reaching the green on your second.

A view from the right side of the fairway, just short of the desert area wash area. This wash area is definitely in play from all tees.

Bisecting the hole after the fairway landing area, a cart path runs across the hole. Beyond the path a rocky outcrop sits before a series of bunkers surround the green. The green here slopes from back to front. Behind the hole a mound on the right can funnel shots back towards the green, but to the left the hole falls away towards the desert.


A view back down the hole from the green.

Hole 2 Par 3
172 | 165 | 154 | 150 | 114 yards

A pretty uphill par 3. Ignore the massive houses surrounding the green and focus on the danger short left where a bunker sits below the hole. There is room to miss long on all sides of this green so take enough club to not be short!

A view back from the green on the teeing area on 2 and the mountains behind.

A view of the green which is angled diagonal from the tee. It is relatively long at 35 yards but not the widest. Mounding around the green can lead to favorable funneling back onto the green.

Hole 3 Par 5
564 | 544 | 502 | 466 | 456 yards


The stone sits at the corner of this dogleg right hole. The bold can take a path over the tree that sits down the right edge of the fairway. Clearing that will position your second shot past the stone and with a chance to get home in 2.

From the tips the stone is only about 250 yards out. Getting behind the stone can thrawt any chance at advancing down the hole.

There is room to land around the stone, however if your line is too far left , a pair of large bunkers sit across the fairway and are in play off the tee with driver.

Once you move beyond the dogleg, the hole plays straight in towards a green that is unprotected by bunkers. A series of bunkers sits down the right side of the hole well short of the green for those right handers who pull their second shots.

Hole 4 Par 4
420 | 370 | 340 | 328 | 256 yards

A straight ahead par 4 that plays slightly uphill. One of the unique things about playing in the desert is the landscape and fauna. Here a saguaro stands, pocked by ball marks from wayward shots off the tee. It is not unusual to see numerous balls still embedded in these poor guys.

The tee shot here requires accuracy. Any wayward shots that miss the wide fairway will find the desert. The central rock outcropping is 60 yards short of the green.

Michael teeing off on the 4th.

The approach in requires carrying the rock outcrop as well as avoiding the flanking bunkers that wrap around either side of the green.

The approach in is to a slightly elevated green

The green has a lower tier in front.

Hole 5 Par 4
464 | 425 | 415 | 389 | 335 yards

Another daunting tee shot requires more precision. This is the number one handicap hole due to the length. A good tee shot is a must here to have a chance at par.

The approach here must avoid front left where a swale and false front will collect any balls hit to here.

Hole 6 Par 4
306 | 295 | 285 | 275 | 261 yards

A short par 4 offers risk takers the ability to reach the green off the tee. A series of bunkers cross the hole at around 80 yards making the golfer decide upon his strategy off the tee. Laying up with an iron still leaves a short shot into the green. Playing over the line of bunkers means taking on another central greenside bunker

The carry from the tips to over the rocks at the start of the fairway is about 160 yards, You then have about 80 yards to work with before the sand comes into play.

The right most fairway bunker is the largest, collecting all those whom hit to this side.

And a view of the green from just behind the central bunker. Missing left will find another collection area below the green.

Hole 7 Par 3
205 | 190 | 172 | 140 | 105 yards

The 7th is a longer par 3 that I feel may be the weakest hole on the course. one time while playing here I hit a thin four iron that cleared the green, bounded right and ended up down below in the parking area for the carts. Luckily no one was hurt and the cart attendants assure me happens all the time.

A view of the green taken from behind and to the left of the hole. The green has multiple tiers so hitting close to the pin is crucial to not having a brutal put over rises,

Hole 8 Par 4
408 | 403 | 352 | 328 | 308 yards

A tough tee shot on this par 4 which features a fairway bisected diagonally by a desert washout area.

The wash can be driven with a really well struck drive but the smarter play is to the first fairway area leaving around 150 yards into the green.

The second shot from the far side of the wash will require a carry over the large bunker short of the green. Another multi-tier green requires precision on the second shot.

Hole 9 Par 5
539 | 481 | 465 | 440 | 415 yards

A straight ahead par 5. This hole is called "Hell Bunker" due to the deep bunker left of the green.

Maybe the least picturesque hole on the course, it is still a demanding hole. Your tee shot must find the fairway here. A bunker juts in from the left, but down past the landing area off the tee at some 340 yards from the tips.

Your second shot should favor the left side of the fairway to avoid the 2 sets of bunkers down the right side. The second set of these bunkers is just short of the green. Don't miss left into the green or you will find yourself seeing just how bad "Hell" bunker really is.

Hole 10 Par 4
396 | 384 | 375 | 337 | 280 yards

As you make the turn onto the back nine at the monument, you enter into what I think may be the strongest 9 consecutive holes I have played in Arizona. Generally holes 7 and 9 let me down a bit but those are quickly forgotten once I hit the 10th.
This tee shot must once again thread the desert on either side. A large bunker also sits partially obstructed down the left side. This hole plays uphill to the hole.

Another view of a cactus with more than a few holes from wayward shots.

From the left side of the hole, you can see you the hole rises towards the green. The right side is lined with desert and the cart path. Below the mound in the distance, a bunker guards the right of the green.

As you pull forward in your cart, you have a great view back down the hole, at the green below you and the desert stretching off into the distance. This may be my favorite single vantage point of a green on the course. Stunning! The green itself is around 40 yards deep so proper clubbing is essential as you approach based upon the pin location.

A view back down the hole taken fro the green.

Hole 11 Par 5
512 | 504 | 460 | 451 | 402 yards

Climbing up to the various elevated tees on 11 lead you to one of the coolest driving holes on the course.

The 11 requires a long carry to a fairway that curves slightly to the right and is elevated above the tees.

The fairway has some slight funneling down the left side where mounding can prevent some shots from reaching the desert.

High above the fairway sits probably the biggest house on the course. Man that is one nice house. Wonder if I could stay in one of the closets?

Your second shot is semi blind up the fairway that is continuing to rise. The hole actually turns back left as you reach the top of the hill. A pair of bunkers sit on either side of the hole, around 120 yards from the green. Laying up just short of these leaves a fine look into the green for your third. Before you head to the green, take a turn back a get a great view back towards Scottsdale.

Another deep green is guarded down the right side by a large kidney shaped bunker.

Hole 12 Par 4
426 | 411 | 338 | 331 | 260 yards

The 12th is another solid par 4 with great views of the mountains to the left. The golfer here is presented with two options of the tee. Layup short of the bunker on the left side of the fairway, or take on that bunker and the narrowing fairway down the right side of the hole.

The second shot in this hole is uphill and will determine the outcome more so than the tee shot.

Your second shot must avoid the bunker complex short left. Another series of bunkers rings the right side of the green.
We got to see a bobcat stalking rabbits on the hole.

A view from about 110 out. That is not the clubhouse in the background, just one of the smaller "bungalows" on the course.

A view to the left at the hills.

And another shot of the green taken from the right of the hole.

Hole 13 Par 3
222 | 206 | 196 | 173 | 144 yards

Another pretty par 3. This one is long but plays slightly downhill. This hole features something you wouldn't expect to see in the desert- water down the entire right side of the hole.

The green is also protected down the right by two large bunkers.

Hole 14 Par 5
584 | 556 | 515 | 500 | 455 yards

Moving around the pond on 13 you tee off back in the opposite direction on my favorite hole on the course "Spanish Dagger". This is an uphill par 5 that turns left sharply around 200 yards from the green.

Depending on your drive, you can attack the dogleg and carry the desert down the left side of the fairway. This will leave a short iron into the green.

A shorter drive or more conservative approach can lead you to play more straight down the middle. This can require a longer club into the elevated green.

The green itself is the guarded well on the left to protect against long shots coming in attempting to get on in two. The right is more open but there is a single bunker short on that side.

A view from atop the hill behind the green looking back down the hole.

Hole 15 Par 4
299 | 283 | 275 | 229 | 221 yards

Following 14 is another great par 4. This is another short par 4 that allows you to go for the green off the tee or play safely with an iron.

A pair of bunkers sit on either side of the fairway at 200 yards out. The tee shot requires around 200 yards carry to reach the fairway, and another 50 yards to clear those bunkers. Another single bunker sits further down the hole, guarding the front right of this green which is tucked into the back left corner of the hole.

A view of the mountains behind the tee.

This is probably the best approach shot of the day. The green nearly hangs on the edge of a cliff. behind the hole is an awesome view to the valley floor below.

Spectacular!

Michael chipping out of the rough on the left of the hole.

And the resulting damage that ensues when you get a little too close to the cacti!

As you finish up 15, enjoy the drive through the boulders to the last par 3 of the day, the dazzling 16th.

Hole 16 Par 3
244 | 234 | 222 | 213 | 164 yards

If ever you have hope of not loosing a ball in your round, you may reconsider as you step to the tee on 16. A severely elevated tee shot down to a large green on the valley floor below. A long poke from the tips at 240 yards, the better play here is to be long.

A pair of bunkers cover the front of the green between the desert and the green. Behind the bunkers the hole dips slightly onto the putting surface. There is plenty of room to miss on all sides of this green, other than short.

Hole 17 Par 4
495 | 455 | 422 | 419 | 370 yards

The 17th considers the descent down into the valley with a par 4 offering a wide fairway for the tee shot.

The tee here is elevated and the first section of fairway should be easy to hit. A lone bunker sits deep right but it is nearly 310 yards from the tips.

Your second shot on the hole must traverse a swath of desert running across the hole. From the front edge of the fairway it is almost 190 yards into the green.

The green is protected on the right side my a large bunker sitting below the green.
.jpg)

The green slopes severely to the front, and falls off to the left. Missing long here is not good as there is hardly any room before the desert is in play.


Hole 18 Par 4
370 | 365 | 348 | 335 | 253 yards

The final hole is another elevated tee shot down to a wide fairway which has bunkers pinching the fairway down around 100 yards from the hole. You can take on that narrow fairway and leave yourself a very short shot in, or layup short of them and have around 120 yards in. There is water down the left on this hole.

.jpg)

To reach the fairway is a 200 yard carry from the tips.

The approach must negotiate another pair of bunkers flanking both sides of the fairway just short of the green.

Another pair of bunkers sit deep among the hills serving as the hole's backdrop.


This green has a false front that will repel anything not to the middle of the green back down onto the fairway.
.jpg)
Playing Troon North you can never go wrong. Whether it be the Pinnacle or the Monument course. I feel like the Monument's back nine is the best of the 4. The conditions here are always top notch and the service is outstanding. I love the entire experience of playing here. No wonder Troon launched into such a successful company with products like this!
.jpg)
I have played Monument 4 times now and Pinnacle once. I cant wait to go back. Sure Troon North is not a cheap experience, but if you make the trip here it really should be on any list of must plays (Along with We Ko Pa and Quintero).

Watch where you are stepping around here. You are in the desert after all!
.jpg)
The views near 15 and 16 are my favorite on the course
.jpg)
Look, its Rickie and Ricky
.jpg)
Sunsets in the desert in the early spring. Anything better?