This course is located directly next to the Lodge at Giants Ridge. Originally designed in 1997, I would say this is definitely the number 3 course on the rotation. There is nothing inherently wrong with its layout to make it #3, it is just The Quarry and The Wilderness just have so much more to offer.
This course offers the most "north woods" feel of the courses. In part, this is because the course feels a bit tighter than the others. My eye is drawn to the trees as the primary hazard on a lot of holes, unlike the holes at the other courses.
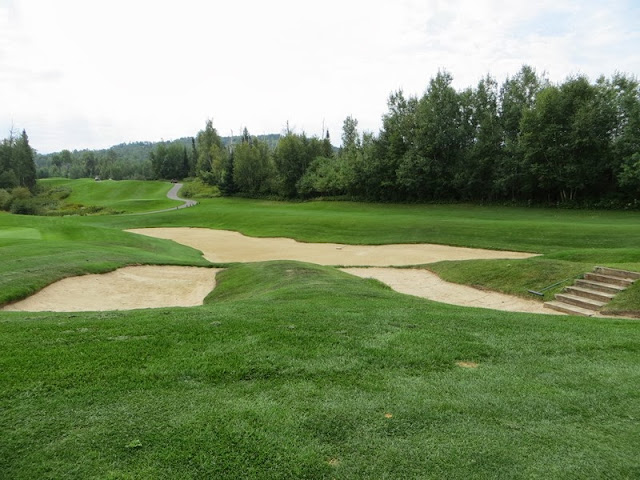
The tees on 1 and 10 offer a great view of both the holes. They are very similar in feel, with the gulley running in front of both tees:
From the tips, The Legend plays the shortest and easiest of the three. It measures 6,930 yards with a rating and slope of 74.3/138. This is 1 point lower in rating that The Quarry and Wilderness.
Hole 1 Par 4
(377/365/350/203)
The opening hole requires an accurate tee shot on this shorter par 4. If you can get the ravine out of the way the hole plays fairly easy.
You must place your tee shot between the bunker and the trees that line the right side of the hole.
If you avoid the trouble off the tee the approach to the large circular green is unprotected.
Hole 2- Par 3
(165/146/124/90)
An easy hole if you hit the green, a tough one if you find the sand. I hit my tee shot just short into the front right bunker but hit an amaze-ball shot and got up and down for par!
Hole 3 Par 5
(501/476/454/397)
One of two of the most famous holes on the course. The most prominent feature is Paul Bunyan's footprint directly ahead off the tee.
Playing directly over the trap is certainly possible, hitting right of it can run you out of fairway if you are a longer hitter. The hole doglegs left around the trees.
Here, Lisa tees off directly at the Giant's foot.
A view back towards the tees from the end of the Giant's foot.
Once you turn the corner, an enormous bunker protects the front right of the green.
On the left side, a trio of bunkers are just short left of the green.
This shot shows the scale of the enormous bunker!
Hole 4 Par 4
(402/381/357/334)
This par 4 requires you find the fairway off the tee. The hole is framed on either side by trees. Down the right a series of small moguls can stop a ball before it enters the woods.
The left side has a bunker that comes into play around 250 yards off the tee.
As you approach the green, you must miss the three large bunkers located left, right and behind the green. The green is fairly wide and a pin placed on the far right can be a challenge to get back to.
Hole 5 Par 4
(412/398/373/351)
Another shorter par 4 requiring accuracy more so than length of the tee. The trees on the right squeeze into the hole about 250 yards off the tee before the hole widens back. The left side threatens as it slopes off towards the trees.
A greenside bunker on the left is the only real protection for the green. The bunker right is too far right to be a problem except for the wildest of shots.
Hole 6 Par 3
(219/180/155/131)
A nice par 3 that is well framed off the tee by a large bunker running down the left side, moguls down the right, and trees behind. The green is 44 yards deep so take that into account with your club selection.
Hole 7 Par 4
(411/388/376/338)
A dogleg left, the proper aiming point on this hole is the rocky area in the middle of the two tall trees in the distance. Again, another hole where the premium is on accuracy off the tee to avoid the dogleg bunker and the trees on either side.
The green rises from the fairway at the end of the hole. It is guarded by 2 bunkers in front. This green is quite wide and fairly deep as well, probably around 60 yards by 30 yards.
Hole 8 par 4
(456/445/418/307)
Finally, a long par 4 on the front nine! A bit wider landing area allows you confidence to hit it long here. There is a cross bunker that juts out from the left. Clearing that from the back tees will require 300 yards. It is probably best just to play to the right of it.
The green is surrounded on three sides by bunkering but is open from the front.
Here is a view back down the hole from the green.
Hole 9 Par 5
(536/516/504/476)
A dogleg left, that falls downhill before requiring a forced carry over water to the green. From the tee don't worry about cutting the trees at all down the left side, the hole doesn't turn that much. Keep it down the left side of the fairway and you will be good.
Depending on if you can catch the hill on your tee shot, you may need to lay up short of the water on your second shot.
There is room to go around the water on the left if you choose.
So the approach on option A, over the water:
And option B, around the hazard:
A view back up the hole.
I ended up carding a 39 with 3 bogeys (on 4, 6, and 7.) 6 was a stupid 3 putt, and 7 was a lost ball into the woods.
Hole 10 Par 4
(410/378/358/221)
A near carbon copy of the 1st hole, but a bit longer and tighter. The obvious first challenge is clearing the ravine while finding the fairway. The bunkers on the right come in around 250 yards and are definitely in play off the tee.
Take note of the second challenge on this hole. The approach to the green must carry a huge false front and collection area in front of the green. From where this picture was taken I hit a shot onto the front of the green that proceeded to then come back off the green, down the hill, and ended up around 30 yards short of the green. The green is about 25 yards deep, so aim for the back of it.
I ended up carding a double here, after hitting the green in 2, though failing to stay on.
Hole 11 Par 3
(157/130/107/91)
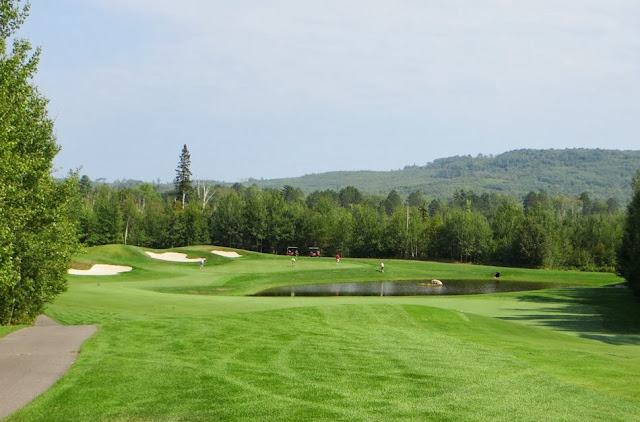
A beautiful par 3. This hole is very reminiscent of the 12th hole at The Wilderness. A pond wraps around and surrounds the front and left. The obvious bail-out is left but a large bunker will likely collect shots that head that way/
Here my father-in-law tees off. I nearly captured a hole in one with this photo!
This is the result of that tee shot!
Lisa, too hit a really great shot. You can see them celebrating here. I hit the green but was the jerk that had a 14 foot putt instead of being inside of 5 feet!
Hole 12 Par 4
(401/383/337/296)
A pretty and treacherous par 4 that doglegs left around that big slope.
I absolutely murdered my drive and found myself on the other side of the cart path. It went for naught though as I pulled my next shot into the sand and suffered my second double of the nine.Hole 13 Par 4
(418/392/355/284)
A narrow chute off the tee before the hole opens up. A cluster of bunkers catches your eye down the right side. For the second consecutive hole, I absolutely piped one. This one was well over 300 and left me inside of 70 yards.
Lisa decided to take a walk in the beaches.
I hit my approach tight to the green, seen here. Lisa is pitching to get on in the distance.
Unfortunately I missed that tiny little putt but got my par.
Hole 14 Par 5
(510/480/470/446)
This is a great hole. Probably the prettiest non-par 3 on the course. The dominating feature are the swooping bunkers framing the landing area.
For long hitters, these bunkers can be cleared off the tee. But for the average Joe this is about where your ball is likely to land. I popped one more great drive to about where the carts were in this photo.
From your second shot, the green is tightly surrounded by bunkers.
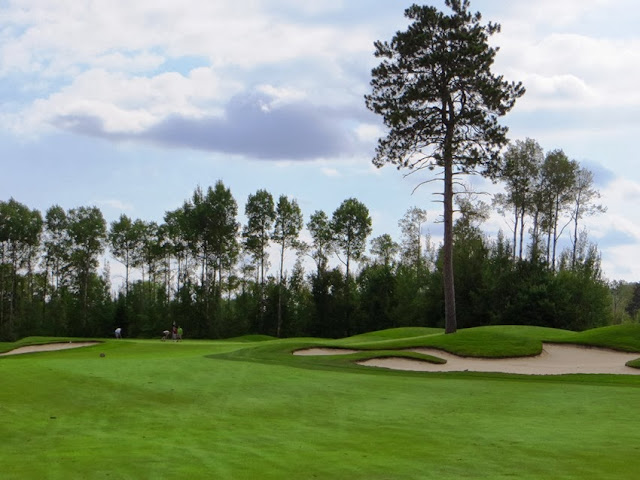
Take a chance at hitting the green or lay-up short. T he large pines on the left of the hole are about 100 yards out.
Hole 15 Par 4
(452/424/409/336)
Trees come in from the left on this straight away par 4. The fairway is bisected by a marshland starting at about 130 yards from the green. The best play is to hit to about 150 yards out and then take your second into the green.
Lisa tees off on the 15th.
A view of the marshland crossing the fairway and the approach into the green. The green is surrounded back, left, and right by three large bunkers.
Hole 16 Par 5
(520/493/470/374)
A straight ahead par 5. This is one of the more open holes on the course, though the edges are still lined with the forest.
The forward tee is crowded a bit by the trees on the right.
You second shot must avoid the 2 large bunkers that are both short of the green. If you lay up on your third, aim to the right side of the fairway to get the best angle at the green and take the second bunker out of play.
Hole 17 Par 3
(226/216/183/137)
Here it is, the courses signature hole. Walk on up the gardened steps to your tee box.
A true test of your tee game, it plays 226 from the tips. There is not much room to miss. With the green being elevated anything short of the green will find the rugged hill sloping down to the lake. Any shots long will likely either find the large bunker behind the green, or come to rest on the hill- making for a knee rattling chip back towards the lake. Left is all but dead. To the right there is a small amount of room to work with, but not much. It is to the right where you will find the drop zone should you miss the green.
The green is somewhat bowl shaped and is bisected with a ridge making the back half of the green slope away from you off the tee. Simply hitting the green off the tee does not offer a gimmie par, as the green is very large and a wayward first shot can leave a long couple of putts.
But it is not all doom and gloom. This is definitely one of the prettiest holes in the state. Stop and enjoy the numerous flowers around the tee boxes and stairs and spend a moment looking out over Sabin Lake.
Hole 18 Par 4
(357/337/312/272)
A rather unremarkable finishing hole. This straight ahead par 4 has a fairway that ends 100 yards from the green. From there the hole passes through a swale of rough before the fairway starts again, leading to the green. This hole is the only one on the course with no bunkers.
Lisa teeing off. You can see the contours of the hole well here.
The green has a large mound on the right side that can be used to funnel the ball towards the pin.
A view back down the hole towards the tee. You can see the split fairway from here.
The 18th ends with a bit of a cart ride back to the clubhouse. This course is definitely not a walking course. The distance between 12 and 13 and then 16 and 17 is pretty ridiculous. A bit of a weird set up but nobody playing these courses seems interesting in walking them anyways.
I ended the back nine only stumbling twice with those two double bogeys, finishing with a 40 and a round of 79. One stroke better than yesterday.
Here's a picture of the group on the first tee.


No comments:
Post a Comment